How to Make a Sourdough Starter
How to Make a Sourdough Starter
Wondering how to make a sourdough starter? It’s really easy. It has been awhile since I have talked “sourdough” so I thought this would be a great time for a mini course on sourdough. To make a truly good sourdough starter you need just three things: flour, water and time. It’s easy, but there’s a few things you should keep in mind first.

Water for your Sourdough Starter
With so few ingredients used to make a sourdough starter, it’s important that the ingredients used be of the highest quality. I suggest you use only filtered bottled water to feed your starter. The chlorine found in most tap water to kill the bacteria, also kills the beneficial bacteria and wild yeasts you need to keep a lively sourdough starter.
Flour for your Sourdough Starter
Any flour, provided it’s a grain-based flour, will work for making a sourdough starter. Rice flour, rye flour, spelt flour, whole wheat flour, barley flour, sprouted flour, bread flour, they will all work. I use unbleached all-purpose flour in preparing my sourdough starter. Sourdough starters made with whole grain flour and sourdough starters maintained on whole grain flours can develop off flavors. Sourdough starters fed on unbleached, all-purpose flour are remarkably resilient, rise exceptionally well and offer a pleasant and mildly sour flavor.
Should you use an Established Starter (Totally Optional)
All you need to prepare a sourdough starter at home is flour, water and time. This wild fermentation of flour and water will yield fantastic results; however, getting a boost in beneficial bacteria and yeasts from an established starter is always helpful. These established sourdough starters, usually sold fresh or dried and powdered, are rich in established bacteria and yeasts. They will give your sourdough starter a much-needed boost. You can find a sourdough starter to give your own starter a boost through bakeries, sourdough-baking friends or through specialty shops online.

Sourdough Jar
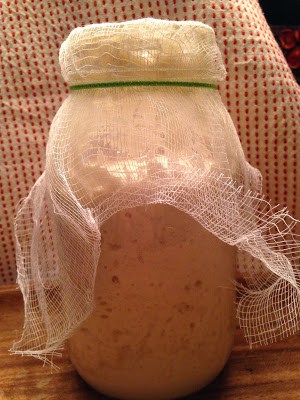
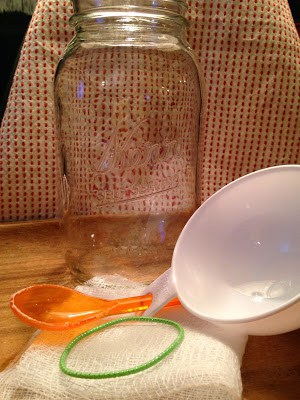
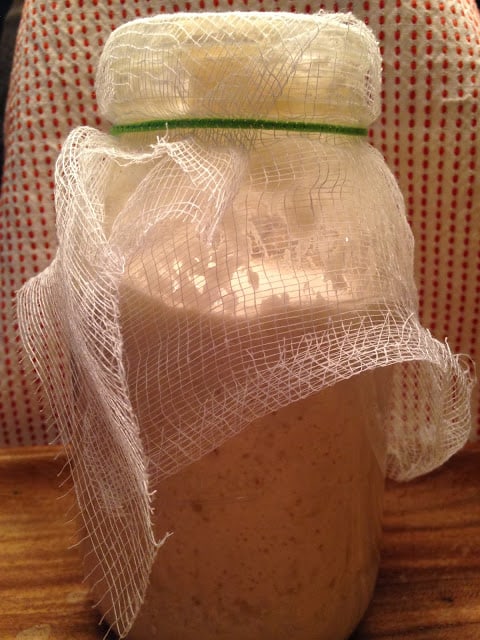
Your jar should not be kept airtight as sourdough thrives on circulating air. The process of fermentation releases carbon dioxide which can build up in a tightly lidded jar, resulting in a messy situation. Instead, simply cover the top of the jar with cheesecloth to keep air circulating and to keep out debris. Remember your starter will expand and rise to twice its volume after a feeding once it’s well-established. The jar you choose should have double the capacity of an un-fed starter. I like to use a glass wide-mouthed mason jar to keep my sourdough starter. A wide-mouthed mason jar makes it easier to feed your sourdough starter, properly stir your starter and allows you to scrap the sides of the jar down also.
![]() Your Whisk
Your Whisk
I use a wooden spoon to mix together the water and flour for my sourdough starter. Some people prefer a Danish dough hook to stir the starter but I prefer not to use any metal utensils when stirring my starter. Stirring helps to begin to ferment the new flour and water mixture added to the starter at each feeding. Proper aeration of the sourdough also helps to ensure that the production of hooch, a thin liquid that sometimes rises to the top of sourdough starter is minimized.

Here are some other posts on Turnips 2 Tangerines you might what to take a look at: Sourdough Love and Start a Sourdough Starter
Sourdough Starter
• flour
• established sourdough starter, optional
• (filtered) bottled water
Instructions
1. Starting the sourdough: Whisk ¼ cup flour with sourdough starter (if using) and 3 tablespoons bottled water in a small bowl. Pour this into a jar and let it sit for twelve hours. Twelve hours later, whisk in ½ cup flour with ⅓ cup bottled water, continue adding ½ cup flour and ⅓ cup water every twelve hours until your starter is active and bubbling. As you feed your starter, take care to whisk in the flour and water thoroughly into the established starter. After four days or so, you can start to dump off half before each feeding. Do this process for one week.
2. To accommodate for expansion of the sourdough when fed, make sure that your jar is only half full after each feeding. This will give your sourdough starter plenty of room to grow or to become active and bubbly. During feeding, you can use the starter you dump off in recipes for scones, biscuits, muffins and cookies.
3. Maintaining the sourdough: After a week or so, your sourdough should be sturdy enough to withstand storage. If you bake infrequently, that is if you bake less than once a week, you can store your sourdough starter in the refrigerator. When needed, bring your starter to room temperature, stir starter, dump out half and feed it about twelve hours before you plan to bake. If you bake more frequently, such as every day or a few times a week, you can store your sourdough at room temperature and feed it with ½ cup flour and ⅓ cup bottled water once a day.
Note: If a brown liquid appears floating on top of your sourdough starter, simply pour it off or stir it back into the starter before feeding. Sourdough bakers call this liquid hooch and it’s harmless. However, it often signifies that you’ve fed your starter too much water in relation to flour or have let your starter go too long between feedings. Sourdough starters are relatively resilient, and bounce back quickly once you resume your feedings.
For all of your sourdough questions go to: Sourdough Home
Recent Recipe: Old Fashioned Liver Pate

